The rebuilding of Norman's 75 Eleganza II[ First | Previous | Next | Last ]
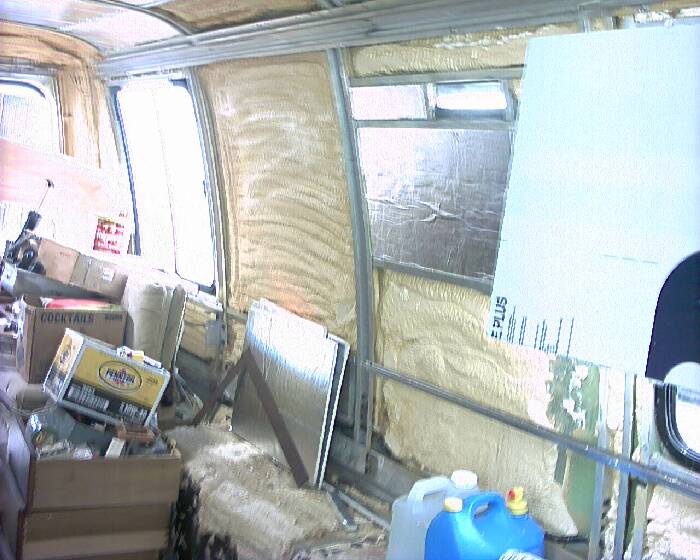
The Interior It was obvious that the particleboard furnishings were shot and would have to go, so they went… It took several days and several trips to the dumpster but it was certainly educational. At least they used screws instead of the staples and glue found in the junk than make today. Everywhere I read on the web, folks were commenting about the poor insulation used in the original design, so I set out to tackle that situation. Using a hacksaw blade to trim the original sprayed urethane insulating material, I removed it to a depth of ½ inch where it wasn't already missing (which was usually the case) from the inner frame surface. I then began cutting panels from the six 4'x8'x1/2 "sheets of rigid foil backed urethane insulation board (R rated @ 3.6) I had purchased and liberally sprayed aerosol urethane foam to fill any and all of the remaining voids prior to positioning the new insulation panels. Finally, I used 2-inch aluminum foil tape to completely seal each panel in place. This also served to restrict the expanding foam from escaping through the cracks, leaving a clean, and airtight foil surface. I estimate that the relative 1-inch urethane layer topped with foil and new headliner or wall panels should yield an R-value in the neighborhood of 8+. Not bad considering what it was to start with (my guess would be around R 3+). There should be several benefits from this approach. First of course, the overall energy savings and comfort factors, then there is the reduced likelihood of any condensation problems in humid environments such as we have here in Houston. It is also relatively impervious to water, so any leaks of any kind should not result in any serious consequence. But best of all it provides a sealed metal barrier, eliminating access to all of those little nooks and crannies where any and all of those creepy crawly critters can hide or make mischief. The aluminum foil does the same thing to their teeth when they try to chew on it! 8-) But, just like the original stuff, it will BURN AND PRODUCE TOXIC GASSES if it catches fire. So, keep that in mind. I have read that many of these vehicles had met their demise as a result of electrical fire. After examining the condition of the wiring in my MH, it was certainly no surprise. It took me about 30 seconds to decide to remove 100% of the existing wire, both AC and DC, on the simple grounds of safety. Having worked in the electronics-engineering field for the past 30+ years, I had an idea there were serious improvements to be made here anyway. So, although I haven't yet decided on all of the details, I felt there were several basic changes that had to be made. First and foremost should be safety, followed by practicality, functionality, serviceability, durability and lastly expense. The electrical service needs to be relocated in a more serviceable location. I choose the wall segment above the LP tank module, below the window. The original cabinet located there had long since disintegrated due to water leaks anyway. A properly ventilated weatherproof container would make much better use of this space. There shall be no AC or DC trunk power wiring in the ceiling or walls. I saw no practical way to access these areas once the were properly insulated and sealed anyway. There shall be accessible cable chases along the wall to ceiling seam, which will supply power to all receptacles and lighting fixtures, which will be mounted within or attached to the overhead cabinets. What an idea! The 2/0 DC trunk cable shall be run in conduit under the frame from the engine compartment to the Onan compartment. Primary lighting shall consist of florescent fixtures, including the bath, although I may decide to keep a couple of those little spot reading lights over the various bunks. More on this as we go along…
[ First | Previous | Next | Last ] |
|
by Norman Wheatley, Houston, TX metrolog@hal-pp.org |
Created by bdub on April 11, 2003