The rebuilding of Norman's 75 Eleganza II[ First | Previous | Next | Last ]
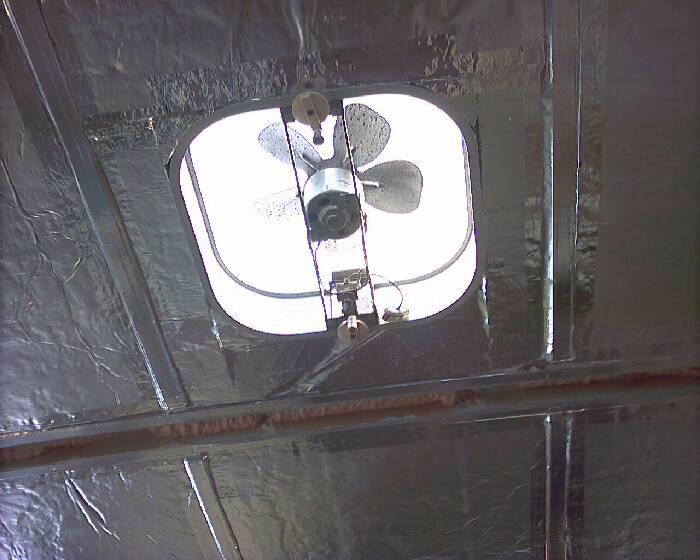
Ceiling Vents My next stop was across town at one of the local RV stores to find a couple of replacement ceiling vent covers. "Nope, haven't seen one of those type covers in years" was the salesman's reply. "You need to buy you a couple of these here new fangled expensive kind of vents and cut you a couple of new holes in the roof so they will fit." As you might expect, I opted for a couple of the standard 14", sort of square replacement covers instead. I find this typical of most salesman. They always want to sell you what they have rather than what you really want or need. With my trusty drill press and pop-rivet gun, I had my original vents repaired within the hour. After removing the original covers from the vents, I drilled out the pop-rivets attaching the stainless steel (S.S.) brackets to the plastic. I then used a nibbling tool (available from J.C.W.) to trim approximately 1/16" from the attaching edge of the original bracket to provide a good clearance fit. I think it's so clever how these manufacturers change the dimensions of things ever so slightly so they can sucker you into spending a bunch of money for a piece of plastic junk. Using my trusty Dremel Tool grinder, I carefully removed the rivets and cheep bracket from the new cover leaving four 1/8" holes. I then drilled 1/8" holes corresponding to the pop-rivet locations of the original S.S. brackets and attached them to the new cover. Presto! Instant replacement covers for my original vents 8-). Not the perfect fit perhaps, but for $20 and a little elbow grease they keep the rain out and work as they did when it left the factory. The only thing left was a minor change in the shape of the replacement seals to allow for the rounded corners and a strip of foil tape to mask the small holes left by the pop-rivet that were removed, although this is really only a cosmetic maneuver and not required. A buffing wheel and some silicon spray brought the aluminum back to life. With a few drops of oil for the motor bearings the vents are as good as new.
[ First | Previous | Next | Last ] |
|
by Norman Wheatley, Houston, TX metrolog@hal-pp.org |
Created by bdub on April 11, 2003